Info.
- Half
- 90 minutes
- For 8 people
- 0.85 € / person
- 251kcal per 100g.
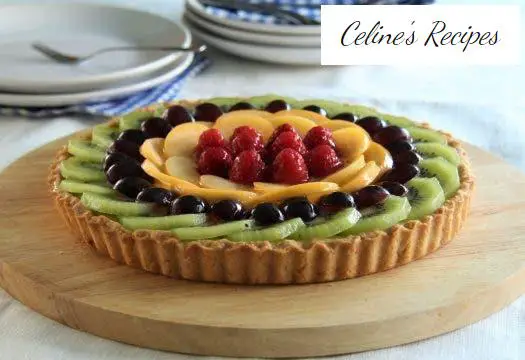
How to make a cream pie and fresh fruits
The cream and fresh fruit tart is one of those recipes that are made almost without feeling, simple and perfect for those who start in the kitchen.
With a couple of basic elaborations of the pastry: custard and short pastry we get you a dessert professional. Clear demonstration that you don’t need to be an expert to make a delicious cake.
The pastry cream is super easy to prepare and very rich, so much that it makes you want to eat it in tablespoons.
And the homemade shortcrust pastry, as we always insist, does not take more than mixing (without kneading) a handful of basic ingredients, leaving it to take shape in the fridge, spreading on the mold that we use and baking. Nothing to do with industrial and well worthy of that tiny effort.
Finally, we finish off the job with a shine bath that is prepared almost alone and that will help our cream cake and fresh fruits look bright and beautiful for longer, because it prevents the fruits from drying out.
The first two pieces of this puzzle, the cream and the dough, can be prepared a couple of days in advance. The first is kept in the fridge and the second, well wrapped in plastic wrap, in any closet in our kitchen.
Then you just have to finish the cake the same day we are going to consume it. This comes from pearls when we do not have time to pull it, we do not always have an idle morning or afternoon to devote to cooking.
About its flavor we can only say that it is tremendously rich, so do not be fooled by its simplicity.
You already know what the saying says: ” in simplicity is taste “. This cake is a good example of this.
Preparation of the cream pie and fresh fruits
Preparation of the pastry cream
- Heat the milk in a saucepan over medium heat, along with the vanilla essence.
- When it is about to boil, but it does not get to do it, remove from the heat and let it temper.
- We beat the yolks in a deep bowl together with the sugar and the fine corn flour.
- We must get a homogeneous mass and without lumps. Add half a glass of milk and stir vigorously until everything is well mixed.
- We repeat the operation until we finish with all the milk in the saucepan.
- Pour the mixture back into the saucepan and cook over low heat, stirring constantly so that there are no lumps, until it thickens.
- Then we remove, go to another container and reserve covered with a transparent film, in the fridge, until the moment of use.
Preparation of the base dough
- We sift the flour into a wide and deep container, add the sugar and a pinch of salt.
- Add the diced butter and mix with your fingers until you get a texture that is reminiscent of crumbs.
- Finally we add the water and work with the fingers, avoiding excesses.
- As soon as all the ingredients are linked, we wrap the dough with plastic wrap and let it rest in the fridge for 30 minutes.
- After the resting time, roll out the dough on a lightly floured surface, up to a couple of millimeters thick.
- We cover the base and walls of a mold-removable 22 cm diameter ovenproof mold.
- Trim the excess and finish off the edges with your fingers with a filigree to make it presentable.
- We cover with sulfurized oven paper and fill with old legumes or specific baking balls.
- We cook in the oven, preheated to 180º C, for 15 minutes.
- We remove the weight and the paper and cook again another 15 minutes before removing and leaving to cool completely.
Gloss bath preparation
- Hydrate the gelatin in a bowl with 3-4 tablespoons of water for five minutes.
- We put the water challenge in a saucepan and heat. When it reaches the boiling point, turn off and add the hydrated gelatin.
- Stir until completely dissolved and allow to warm.
- The gloss bath will thicken as it cools, it must be watched and removed from time to time so that it does not gelatinize excessively.
- Once it has a consistency like jam, we finish the cake.
Assembling and finishing the cream cake and fresh fruits
- We unmold the cooked base mass and fill it with the pastry cream, spreading well over the entire surface, without reaching the edge.
- We will need a little space to place the fruits without overflowing.
- Peel and cut the kiwis into thin sheets. We wash the apricots, we cut them in half, remove the stone and laminate.
- We cut the grapes in half lengthwise.
- We place the fruits to our liking on the pastry cream and top with some raspberries in the center.
- Brush with the gloss bath, ensuring that there are no gaps left uncovered.
- We reserve in the fridge for at least an hour for the jelly to finish settling.
Here you have a step by step in photos where I show how to prepare this recipe for this cream and fruit tart . Do not miss any detail so that it turns out perfect, delicious.
Tips for a tart cream and fruit tart
- It is important that, in the preparation of the base mass, the butter is very cold.
- If this is not the case and we are in a hurry, but we want to prepare it at home, we can put it in the freezer to speed up the process.
- We can also buy a sheet of broken dough in the supermarket and save this step, although the result will not be the same.
- The base dough can be prepared a couple of days in advance and have it baked and ready to fill.
- In the preparation of the pastry cream we can use a vanilla bean, as a substitute for the essence, and enrich it with the skin of a lemon (very fine and without any of the white part so that it does not become bitter). It will be more aromatic.
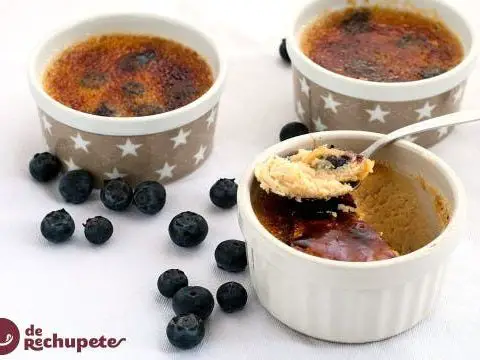
- Almost any variety of fruit can be used. The berries are especially visual, as are the red berries (strawberries, blueberries, currants, cherries, and more). Choose a good color combination to create contrasts and get better results.
- The shine bath can be flavored with a teaspoon of liquor, adding it at the end of the process and after removing the saucepan from the heat.