
Info.
- Half
- 240 minutes
- For 10 people
- 0.6 € / person
- 305kcal per 100g.
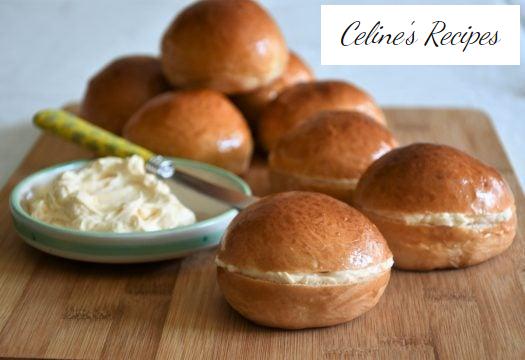
How to make Bilbao butter buns.
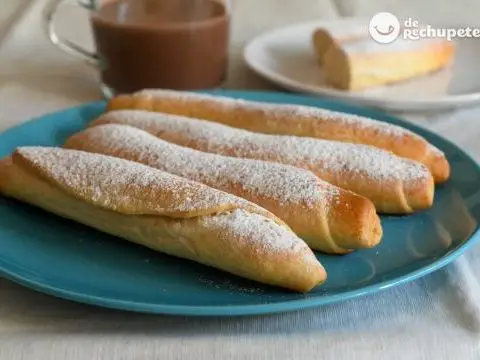
The buns butter Bilbao are one of those sweet must try if you pass through the city. And if this is not the case, there is always the possibility of preparing them at home with this recipe.
They are perfect to accompany the moment of breakfast , after dinner or snack, along with a steaming coffee with milk, an infusion or, simply, a glass of fresh milk.
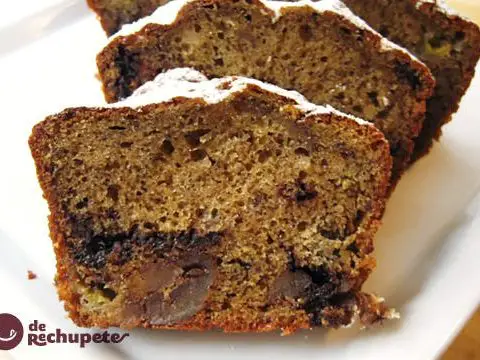
We are passionate about buns, and this is perhaps the recipe that I like the most, although of course, there are other types of artisan and homemade pastries that succeed on the blog. Be sure to try the traditional Swiss , the cream filled Cristinas , the Swedish buns or the Nordic Lenten buns .
A bit of history… origin of the butter buns
These popular buns arrived in Bilbao from Poschiavo, a small town in Switzerland. They did it with the help of Bernardo Pedro Franconi and Francesco Matossi, two cousins who opened a small patisserie on Calle Correo around the year 1830. They linked it with a café that was open towards the Plaza Nueva in the back.
They specialized in Russian cakes, triangles with rum and, of course, brioches. The success of the business led them to expand with a second establishment in Bilbao and to open franchises in other cities (Santander, Burgos, Pamplona and Madrid) under the brand “Matossi & Franconi y Cía”.
The Bilbao butter buns have a slightly oval shape, but it is easier to make them round and the flavor does not change. The result is equally delicious.
Preparation of the dough of the buns
- In a deep container, mix the milk with the sugar, the beaten egg and the salt.
- We add the yeast and dissolve it with the tips of the fingers, gently.
- Next we add the flour, little by little and stirring at the same time with a spoon.
- When the dough becomes dense, we put the spoon down and work it with our hands.
- First in the container itself, then on a lightly floured or greased work surface until a smooth and fine dough is obtained.
- We add the butter in pieces until integrating.
- We roll the dough and leave it to rise in a wide and lightly greased container until it doubles its volume. The time will depend on the ambient temperature. The higher the temperature, the shorter the raising time and vice versa.
- Once the dough is ready, we pour it onto the work surface and press gently with our fingers to degas.
Kneading, shaping and baking the butter buns
- We weigh the dough and divide the total weight by 10 or 12. We take portions of equal weight so that all the buns come out the same, but without going over size. More than 50g would be too much.
- We take each of the portions of dough and roll.
- We place on a baking sheet covered with vegetable paper or a silicone sheet, leaving space between them and placing the wrinkled part at the base.
- Brush all the buns with the beaten egg and leave to rise again until they double their initial volume.
- At half fermentation brush the buns with egg again.
- When the buns have doubled in volume, put them in the oven, pre-heated to 180º C and cook for 10-12 minutes.
- The baking will be in the central tray with temperature up and down. Remember that each oven is a world, I have put 2 minutes of variation for you to review so that they are perfect.
- We remove the buns from the oven and let them warm on the tray for a few minutes.
- Then we transfer them to a rack until completely cooled.
Preparation of butter cream
- Meanwhile we prepare the butter cream of the filling. To do this, heat the sugar and water in a saucepan.
- Shake gently, without stirring, to mix both ingredients.
- We bring to the boil for a couple of minutes or until we obtain a slightly syrup, without color. We remove from the fire and temper.
- We beat the egg and the yolk until white and double in volume. Little by little we pour the syrup and beat without stopping until the cream cools.
- Then add the butter in ointment point while continuing to beat.
- At first it will appear that the cream is cut, but this is normal. You have to keep whisking until it turns creamy.
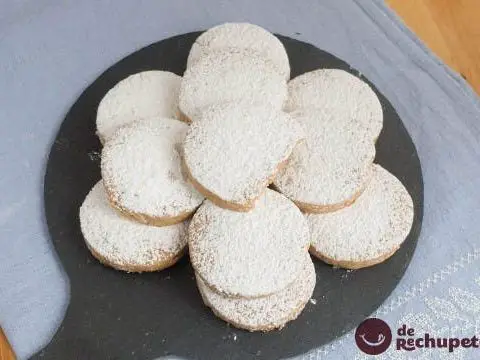
Presentation of the Bilbao butter buns
- Finally we cut the buns in half, horizontally.
- Spread the base with a layer of butter cream, cover with the upper half and ready to eat.
- Of yummy, I assure you. The work will have been worth it yes or yes.
As always, at the end of the entry you have the photos of the step by step. Do not miss any detail of this recipe for famous butter buns throughout Bilbao.
Tips for some delicious Bilbao butter buns
- At the time of making the buns, the dough may tend to shrink. This is fixed by letting it sit for about ten minutes before trying to form the buns again.
- The oven time is merely indicative. Each oven is a world and yours may need more or less. Remove when the buns have grown and are golden brown.
- If you are not going to fill the buns at the moment, you can keep them once cold well preserved from the air. They last in good condition for a couple of days. They can even be frozen.
- If the buttercream becomes lumpy and looks cut, it’s because it’s too hot. To change its texture and get the cream you just have to keep beating. You will see how it changes and fixes itself.
- We can sprinkle with sugar before putting in the oven to provide an extra touch of sweetness and texture.