
Info.
- Easy
- 60 minutes
- For 10 people
- 0.5 € / person
- 305kcal per 100g.
How to make Christmas honey cookies . I do not know if it happens to you like I do, I have more and more things in the kitchen between dishes, molds, casseroles and various odds and ends that I am buying to make all those dessert recipes that you see on the blog.
Periodically it is Jimena who convinces me to do a little cleaning and get rid of some that I have never really used. The idea of the cookies that I have prepared today was clear to me a long time ago for two reasons. On the one hand I wanted to use those Christmas cookie molds, one of those junkies that were saved in the last cleaning, which I bought a long time ago in a store, I don’t know where anymore, and another, I wanted to make some honey cookies to give away at Christmas.
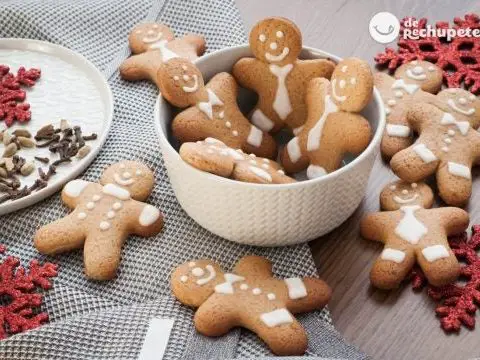
On the blog you can find various types of Christmas cookies , they are a small summary of several years preparing cookies to give away this holiday season. So here I bring you a recipe for spiced honey cookies that I think are perfect as a Christmas gift for friends.
These are cookies with a lot of flavor thanks to honey, they taste like honey, and the spices that accompany it. They are very tasty and will last a lot of days in good condition, which is perfect so that we can pack them and give them away without having to prepare them the day before.
The process is very easy, we will have the cookies ready in a moment, and the work of decorating them is more of an entertainment. For those of you who have children at home, I encourage you to prepare them with them, they will love to paint on the cookies and what better than a home family job this Christmas. Cheer up with these cookies, you will have 25 perfect units for a snack or to give to your friends and family.
Preparation of the dough for Christmas cookies
- We put the honey and butter in a saucepan. Heat over medium heat, stirring occasionally, until the butter has melted and the honey is completely liquid.
- Remove from the heat and add the sugar, stir to dissolve. We let the mixture temper.
- In a bowl add the flour, the cornstarch, the pinch of salt and the spices. Mix well with a fork and reserve.
- When the honey with butter is warm we add it to the bowl of the flour. We pour the whole milk and mix with a fork until we have to do it with our hands and end up forming a slightly damp, but not sticky, ball of dough.
- We keep the dough wrapped in plastic wrap in the fridge for a few hours until it has hardened.
- When the dough is hard we place a portion between two oven papers.
- We keep the rest in the fridge so that it does not soften excessively.
- We stretch the dough with a rolling pin until it has the desired thickness, around 5 or 6 mm. If we want more uniform cookies we can use two sticks as a guide where the roller will end up resting.
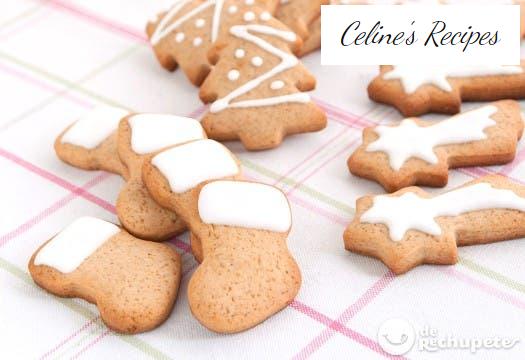
- We cut the cookies with the cutters we want, in my case with a Christmas theme. We keep them in the fridge until they have hardened again, a few minutes.
Baking Honey and Spice Christmas Cookies
- We preheat the oven to 180ºC.
- Bake the cookies on the tray in the middle of the oven for 12 minutes or until we see that they begin to brown. Remember that each oven is a world and the baking time can vary from one oven to another. The heat should be above, below and hot air.
- We remove the cookies from the oven and place them on a rack.
- Leave the cookies on the rack until they have completely cooled.
Preparation of the icing and final presentation of the Christmas cookies
- While the cookies cool, prepare the icing to decorate them. To do this, we put the egg white in a bowl and beat it for a few seconds, until foam begins to appear.
- We add most of the icing sugar, leaving a part to adjust the consistency of the icing that results.
- Mix well with a fork until you get a thick cream. Add the vinegar droplets and integrate.
- We will add the rest of the sugar if we see that we have left a too liquid icing.
- It should have a consistency like toothpaste. It is to draw the lines or to write. If we want to use it for fillings, it should be a little lighter, like carpenter’s glue.
- Once we have the thickest consistency, we set aside a quantity of icing for a bottle with a fine spout. Then we add a few drops of water to the rest until reaching a more fluid consistency.
- It is the perfect shape for our decoration fillings, like glue. Follow the step by step of the photos and you will see the perfect appearance of the icing.
- We put our two consistencies of icing in different bottles and we start designing the details that we want in the cookies.
- We have to take into account that the icing will take quite a few hours to dry. That is why the ideal is that, once we have the decorated cookies, we leave them overnight without handling to avoid disasters.
We will be able to spend a fun time with the children decorating these typically Christmas cookies, which will be super rich and crunchy, a totally delicious delight.
You can see all the photos of the step by step in the following photo album .