
Info.
- Easy
- 90 minutes
- For 8 people
- 0.8 € / person
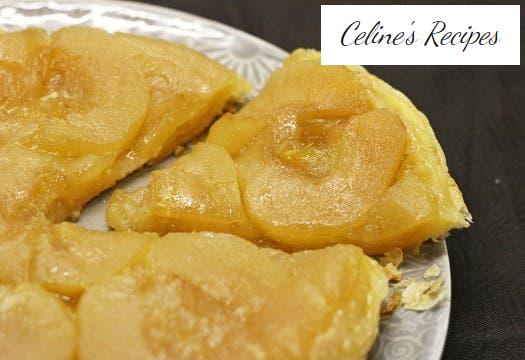
How to make an Apple Tatin Pie . This cake is one of the dessert recipes best known to all of you, although then in practice we do not usually make it at home.
It is actually a variant of the traditional apple pie , but in this one the apples are caramelized before being put in the oven.
Let’s say it is a cake “upside down” or inverted , when first going from a base with the ingredients and the dough on top.
You can assure that it is quite simple and once you do it for the first time, you are going to repeat it many times.
Today I bring you the original recipe, but there are variations of this that allow other fruits such as pear or peach.
The particular history of this dessert takes us to France, in the Orleans area. A territory that thanks to its hunting reserves, attracted wealthy businessmen and politicians from the capital Paris.
There was the Tatin Hotel and its restaurant, run by the sisters of the same name. As in many other recipes, this one is also believed to be the result of a slip in the kitchen.
One of the sisters, Stephanie , made the wrong apple pie and caramelized the apples. To hide his mistake, he decided to cover them to hide them. At the same time, other stories about its origin circulate.
The fact is that the cake thus prepared had a great success among the restaurant’s clients, and with it became the specialty of the house. From here he arrived in Paris at the hands of a famous pastry chef, who named the dessert Tatin cake in homage to the sisters of Orleans.
Today it is well known and traditional in our neighboring country. Where it is not only made of apples, there are a large number of variants, both sweet and salty.
Preparation of Tatin cake
We will need a metal mold, suitable for the oven, between 18-21 cm. for these quantities. The puff pastry on the market is usually a little larger, but cutting a little of the excess dough will not have a major problem.
- Once the mold is chosen, we grease it well with butter, which will guarantee the final removal of the cake from the mold.
- Next we sprinkle a layer of sugar at the base of the mold.
- I have chosen apples of the golden variety, which adapt very well to desserts made in the oven. It is juicy, somewhat sweet, and slightly acidic.
- They should not be too ripe, better turning green, so that they have a good consistency and hold the whole time of baking.
- We wash and peel the apples, we remove the core and cut them in half.
- We are placing them in the mold, with the curved part up. The gaps that do not remain are filled with smaller pieces, which we adapt to the shape of the space to be covered.
- Evenly, covering all the apples, spread the sugar on top and the butter in small cubes.
- We place the mold on the tray, on the bottom, and bake for 30 minutes at 200ºC. With heat up / down function.
- During this time the apples will soften and caramelize.
- Remove from the oven and let cool about 5/6 minutes.
Final baking and presentation of apple tarte Tatin
- To cover the cake and create the subsequent base, you can use shortcrust pastry (brise) or puff pastry .
- I have decided on the latter since I like its texture more, and it will be more consistent.
- We place the spread dough on the mold. We cut the excess leaving 1 cm. older.
- We adjust it to the apple base, and we make a border all along the perimeter.
- With a skewer we make holes throughout the lid so that it does not rise with the heat of the oven.
- Now we place the tray in the central position, the mold on it and we bake again, this time 30 minutes at 180ºC.
- Check the package instructions for the manufacturer’s recommended times and temperatures.
- Anyway, it will be ready when you see that it is golden and with a crispy texture.
- We take the mold out of the oven and let cool 10 minutes at room temperature.
- This point is important since if we leave it longer we run the risk of the syrup hardening. This way we avoid that later we cannot unmold the cake well.
- We turn the mold, being careful not to burn yourself. Placing a palm of the hand well extended on the puff pastry base.
- We transfer the cake to a plate / platter and let it continue to cool. It can be consumed with some heat (but does not burn), warm or cold.
Either way it’s delicious. I have accompanied it with a little whipped cream and liquid caramel, to accompany and mount an authentic party on the plate.
A cake that takes time (1 hour and a half) but very simple and really “yummy”.
Be sure to enjoy all the yummy sweets in our dessert recipes.