Info.
- Half
- 90 minutes
- For 10 people
- 0.8 € / person
- 380kcal per 100g.
How to make chocolate gypsy arm.
Although this recipe seems to be made for the world’s chocolatiers, we are sure that anyone can fall into their networks.
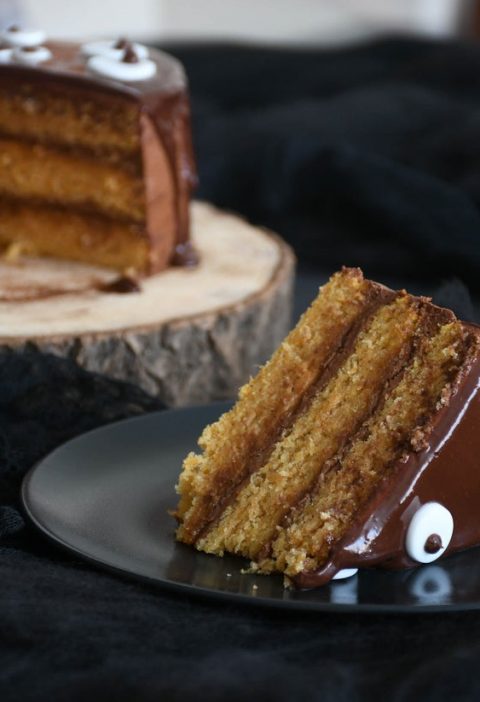
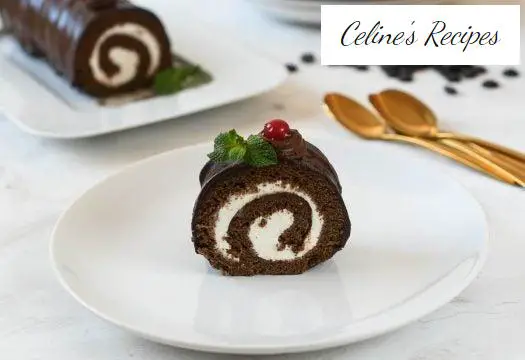
It is a chocolate gypsy arm that is difficult to resist. Chocolate cake filled with whipped cream and covered with a thin layer of chocolate ganache to finish the job.
A perfect dessert to pay tribute to yourself at any time of the year: cool from the fridge in summer, from the weather in winter. Imagine accompanying it with coffee or tea at the table, as the finishing touch of a meal with friends or family. Is your mouth not watering?
If the answer is yes, we have to insist that you prepare it. There is nothing like a good homemade dessert .
In the blog we are with the gypsy arm butt, we like it at home and we try to do it in every possible way. You will find the classic gypsy arm filled with cream , the original gypsy arm with lemon curd , the gypsy arm tiramisu , the chocolate filling or the chestnut cream .
With simple ingredients, no need to use strange gadgets (beyond the rod mixer) and simple, this gypsy arm has everything to succeed.
However, there are three preparations to make: the sponge cake, the filling and the topping. For this reason we recommend that you organize and prepare the first two the day before you want to enjoy it.
Then you will only have to finish the job with the topping, leave it to rest in the fridge until it is time to serve and attack!
Preparation of chocolate gypsy arm
Making a gypsy arm is easy. The cake recipe is the basic of the Genoese cake , which could not be easier.
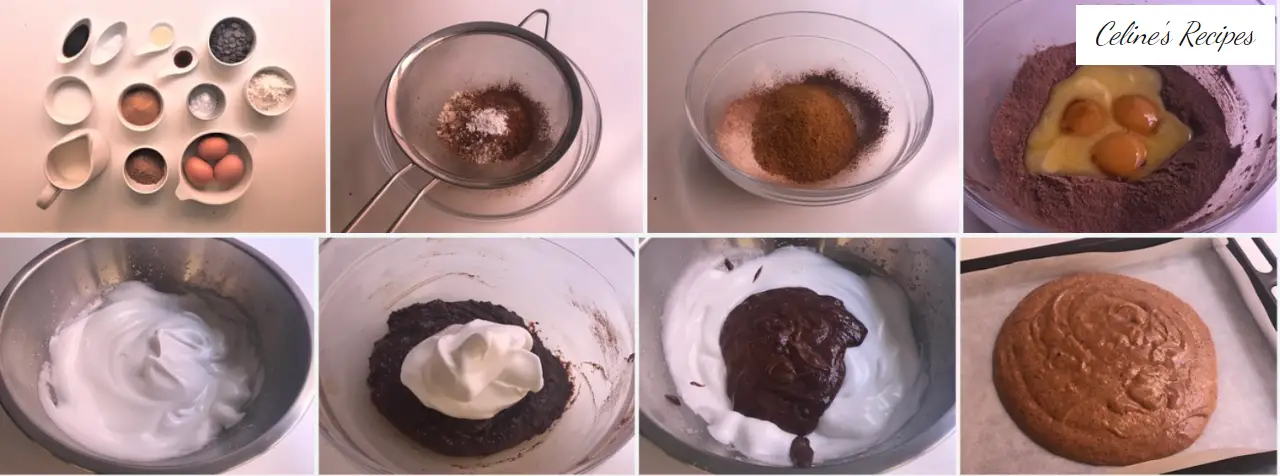
For the brownie plate. Genovese sponge cake
- We mix cocoa powder, baking flour and chemical yeast and sift to loosen and aerate.
- Add the salt, remove the brown sugar to homogenize and make a hole in the center.
- Incorporate the yolks of the eggs (reserving the whites for the next step), coffee, vanilla extract and melted butter. We mix.
- We beat the whites with electric rods or a robot and, when they are foamy, we add the white sugar little by little and without stopping beating until we get a well-assembled meringue.
- When the meringue is ready, add a good ladle to the previously prepared chocolate mixture and mix with a silicone tongue and enveloping movements, from bottom to top and gently.
- We incorporate this mixture to the rest of the meringue and mix again gently until homogeneous.
Baking the brownie
- Carefully pour the dough onto a cookie sheet lined with parchment paper and spread over the entire surface.
- We introduce the tray in the lower part of the oven, preheated to 175 ºC with heat above and below, and cook 12-15 minutes.
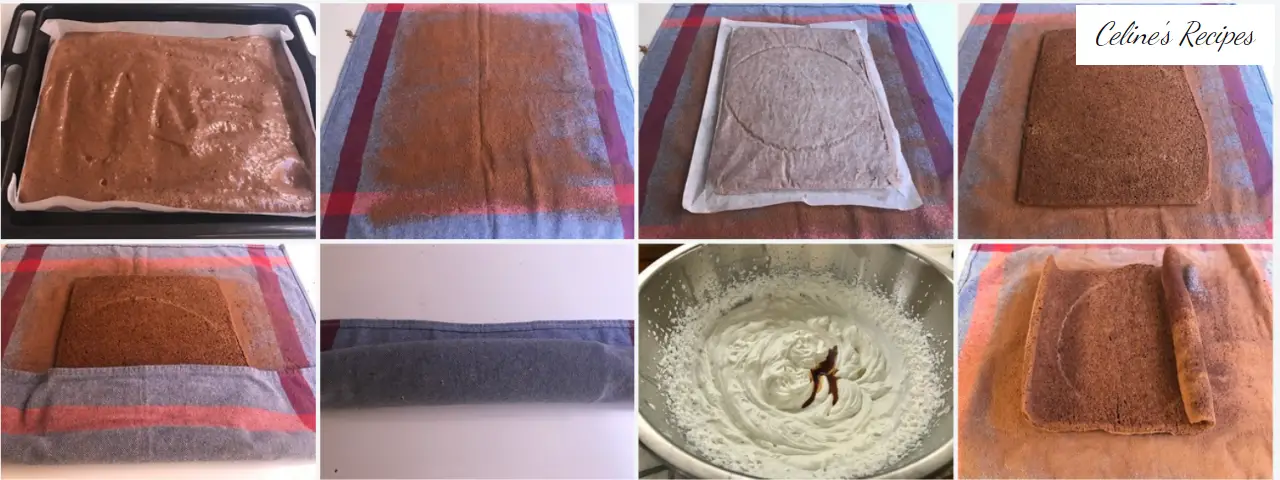
- While the cake is cooking, prepare a clean cloth by dusting it with cocoa.
- When the cake is done, invert the tray on the rag and unmold the cake plate. We remove the baking paper carefully.
- We immediately roll up the rag making a roll with the cake (the rag must be rolled inside the cake) and let cool completely.
For the cream filling and the assembly of the gypsy arm
- When the cake is cold we prepare the filling.
- For this we put the liquid cream to mount in a bowl and beat with electric rods or a robot. It has to be very cold for it to mount well.
- When the grooves of the rods begin to be marked, add the icing sugar in several batches and the vanilla extract and continue to beat until incorporated.
- We unroll the cake taking care that it does not crack and spread the filling with a spatula or a blunt knife.
- We roll the cake with the help of a rag, wrap it in plastic wrap, tightly packed, and freeze.
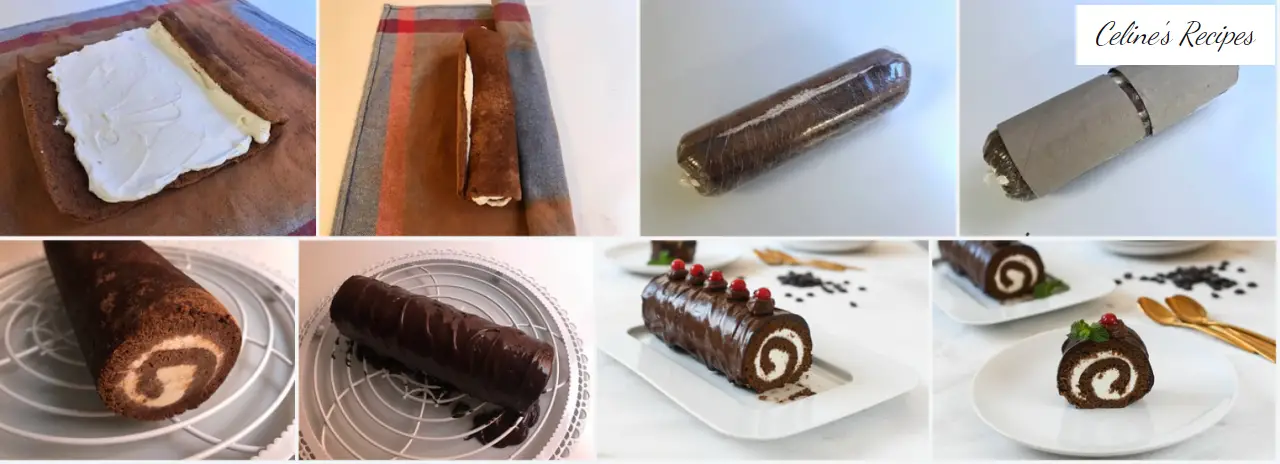
For the chocolate topping
- Once the gypsy arm is frozen, we prepare the chocolate covered ganache.
- For this we cut the chocolate, put it in a bowl and heat it in the microwave for 30 seconds at half power.
- On the other hand, heat the cream in a saucepan and, just before it starts to boil, remove and pour over the chocolate.
- Add the invert sugar or a tablespoon of powdered sugar (if you do not have time to make invert sugar or you do not have it) and let it rest for five minutes before stirring gently until homogeneous.
Termination and presentation of the gypsy arm
- We place the gypsy arm on top of a grid with a tray underneath and pour the ganache on top, ensuring that we cover all the sides.
- Since the arm is very cold the ganache will solidify quickly. We keep in the fridge until serving time.
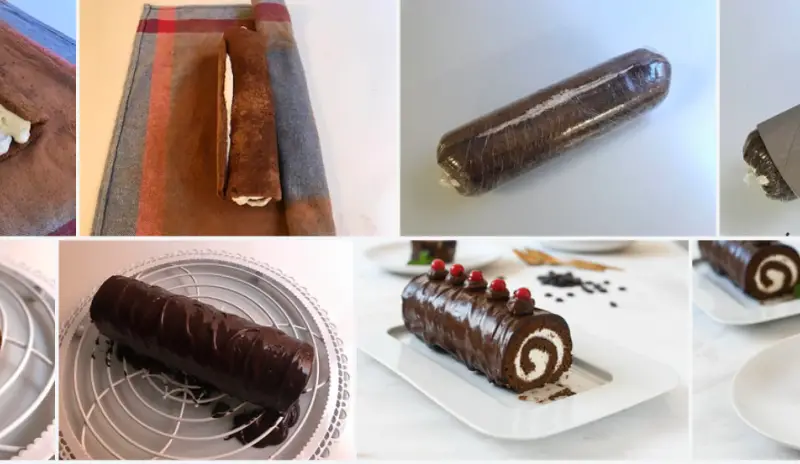
You can see all the step by step photos of the chocolate gypsy arm recipe in this album. Do not miss any detail and it will be perfect, it is worth all the work, I assure you.
Tips for a Perfect Chocolate Gypsy Arm
- The sponge cake plate is fragile and must be handled carefully, especially when it comes to unwinding and filling the whipped cream.
- The cream must be very cold so that it mounts without problem. We can put it in the freezer 10 minutes before beating and also the container in which we are going to mount it.
- There are creams that, once assembled, hold very little time. It is convenient to buy quality brands. Another solution is to add a small amount of cream or mascarpone cheese (about 50 grams) to add body.
- So that the gypsy arm is not crushed by the face where it supports, we use a cardboard tube cut in half (like the roll of kitchen paper) along its length and place the arm, already wrapped in plastic wrap, inside .
- We keep in the fridge for a few hours so that the arm defrosts slowly and it is easier to portion and serve.