
Info.
- Half
- 150 minutes
- For 10 people
- 0.6 € / person
- 285kcal per 100g.
How to decorate Christmas cookies . I admit it, I love Christmas.
I like the atmosphere at home, placing the tree as a family, when my mother cooks and lets me help her prepare what will be, for sure, a formidable dinner.
I think this is so, mainly for everything that has to do with cooking, preparing homemade polvorones that my sister will love, marzipans for my mother, panettone or a roscón de Reyes for breakfast, in short, it is a of the special times of the year and I try to enjoy it as much as possible.
One of the rituals that we have acquired in my family is to decorate the tree, each one providing something that characterizes or pleases him. For example, my sister places some felt socks that she made at school when she was little and that she keeps like a treasure.
My father puts a few bags with chestnuts, do not ask me because, in short, everyone contributes what they can think of to decorate a tree that in the end almost seems like a bazaar rather than a Christmas tree .
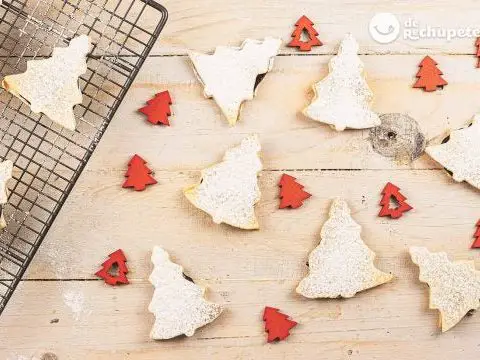
My grain of sand to the family custom will be some cookies decorated with Christmas trees , some mini Christmas firs . Preparing some Christmas cookies is very simple, what will give you a little more work will be its decoration.
There are multiple recipes, some of my favorites are the famous gingerbread cookies very typical in Germany or Belgium, or the delicious Spritz butter cookies , which are also made in Germany, or the Roscón de Reyes cookies .
If you have children at home, preparing these decorated cookies can become a whole family party. I encourage you to spend a little time, in addition to being great, you will have a good time with this craft work to taste and decorate.
Preparation of the dough for Christmas cookies
- We put in a bowl the butter, which must be with the texture of the ointment, and the sugar.
- We beat both ingredients, but only just enough to integrate them, since if we do it in excess the cookies will tend to deform during baking.
- Add the whole egg and mix.
- It is important that the egg is at room temperature, at the same temperature as butter. Removing both from the fridge at the same time is enough.
- We incorporate the sifted flour and with a fork, in principle, and then with our hands, we begin to incorporate it.
- We shape the dough into a ball and divide it into several portions.
- We wrap each one of them in plastic wrap and let them rest in the fridge for 2 hours. Dividing the dough is simply to facilitate further work.
- At the time of putting the cookies, we remove the pieces from the fridge as we need them.
- If we leave them at room temperature for a long time, the dough will end up softening and that will help the cookies to deform during baking.
Roll out the dough, cut and shape the Christmas cookies
- On the work surface we place a sulfurized paper or vegetable paper.
- We place the first portion of dough directly from the fridge and put a new vegetable paper on it. The papers will ensure that the dough does not stick to the work table or the roller.
- With a rolling pin we begin to stretch the dough until we have a thickness of about 6 mm.
- To ensure uniformity in thickness, we can place on each side of the dough some sticks with that diameter, which will serve as a guide and will prevent the roller from going deeper in some areas than in others.
- With the dough already stretched and the oven preheated to 175º C, we shape the cookies with the chosen cutter. In this case the fir-shaped molds.
- We keep the already cut cookies in the fridge until they are hard again.
- We collect the remaining clippings and knead them again and stretch them again to use again.
- It is not advisable to use more than twice the mass. Since after the second time it is most likely that the cookies will be very deformed due to the manipulation to which we would subject the dough.
Baking Christmas cookies
- When the cookies are hard again we place them on the baking tray directly.
- Temperature at 180º C in the middle position with heat up and down, without air.
- We let them cook in the oven for 12-15 minutes. Depending on the size of the cookie and until we see that the edges begin to brown.
- We must bear in mind that the ideal is to place cookies of the same size on the same tray so that the cooking is uniform.
- We remove the cookies from the oven and transfer them to a rack to cool completely before decorating.
We have to be very careful with this trasbase since the hot cookies are very soft. It is very easy to break them when taking them to the grid. As they cool, they will become hard.
Here you have a step by step in photos where I show how to prepare this recipe for Christmas cookies . Do not miss any detail so that it comes out perfect.
Preparation of cookie icing
- In a bowl, beat the white pasteurized lightly, just until it foams, with a few seconds it will be enough.
- Today we can find pasteurized egg whites in many supermarkets, Mercadona, El Corte Inglés, you will have no problem finding it.
- We incorporate the glass sugar little by little. Without the need to sift it, and with a fork we incorporate it into the whites.
- We beat no more than 3 or 4 minutes, so that the icing is not brittle or opaque.
- It is essential that we use icing sugar, not ground or crushed sugar.
- The icing sugar contains a percentage of starch which makes it essential to achieve the texture of the icing and to be able to work with it.
- Like the amount of sugar needed to get a writing texture on the icing. It depends a little on the ambient humidity.
- It may be that the proportion of sugar can vary by 10 gr. older or younger. Before finishing mixing, add the vinegar drops.
- The consistency that we need to draw the edges of the cookie and that this edge serves as a containment for the filling icing must be such that when you lift the fork of the icing, a peak forms in it and in the fork another one that ends up falling , it would be like the texture of toothpaste.
- If we see that it is too thick we add a few drops of water. If, on the contrary, it has become too fluid, add more icing sugar.
Glaze tinting and color for decoration
- We reserve ¾ of the mixture for a bowl making two groups that we will later dye in different colors.
- A higher percentage of icing to stain green and a lower percentage for the trunk brown.
- Add a few drops of the chosen colors and mix well.
- At this point we can keep the icing covered with plastic wrap in the fridge for several days, until the moment we use it.
- We separate from each color a part that will be the one we use for the edges. It should have a texture like toothpaste, rather hard.
- We go back to work the rest of the icing to get now what will be the filling texture.
- Add a few drops of water until we get a consistency like carpenter’s glue. It should be in such a way that when the fork passes over the surface of the icing, the grooves are marked for about 10 seconds.
- We already have the two necessary icing textures, the edge and the fill.
- We place each of the colors in each pastry bag with a nozzle of No. 4 and reserve until the moment of use. We can also use specific bottles for decorating with icing instead of pastry bags.
Christmas cookies decoration
- With the writing consistency icing we contour each cookie and let it dry for 20 minutes.
- With the filling icing we cover the entire surface of the cookie up to the edge we have drawn.
- Sprinkle with the colored shavings immediately, so that they stick together before the icing begins to dry.
- We allow to dry, depending on the humidity and the ambient temperature, until the icing has completely hardened. This process will take you quite a few hours, I usually leave it overnight.
We already have our Christmas fir cookies ready, we can use them to decorate the tree if we pass a string with the help of a pin or as a Christmas gift. In both cases I am sure that you and your loved ones will love them.
On the blog you can find various types of Christmas cookies , they are a small summary of several years preparing cookies to give away this holiday season.
I have prepared bags with homemade Christmas cookies and I assure you that this recipe will become a top of my cookie gifts, because they are incredible in flavor and are very crispy.