
Info.
- Easy
- 300 minutes
- For 10 people
- € 0.3 / person
- 247kcal per 100g.
How to make sliced bread .
I am one of those who think that making a good recipe for bread at home are almost bigger words.
The shape and time of kneading, the resting times, the rolling, the baking, are key and fundamental points for successfully baking a loaf at home .
Today I bring you a recipe that will start your love for making homemade bread . It is a very simple recipe in which we do not need sourdough, the kneading work is small and the result is more than good.
.instagram-follow img{width:100%;height:auto;} @media screen and (min-width: 1000px) {.instagram-follow {display:block;clear:both;float:right;width:50%;margin-left:1em;}}
It is a perfect homemade bread for sandwiches and sandwiches, with a dense and fluffy crumb, no holes, with a soft crust, a homemade bread that, if it happens to you like me, will last a breath at home.
The only trick may be to properly degas the dough in due course, to avoid air bubbles remaining that form classic holes when baked. I am almost sure that you will like this bread as much as I do. At home it doesn’t last more than one sitting, in fact I think I’ll bake several for next time.
In the blog you can find other bread recipes of those to show off with yours with little effort. Some muffins bread very easy to prepare and a French baguettes that will make your bocatas a luxury.
Preparation of the dough for sliced bread
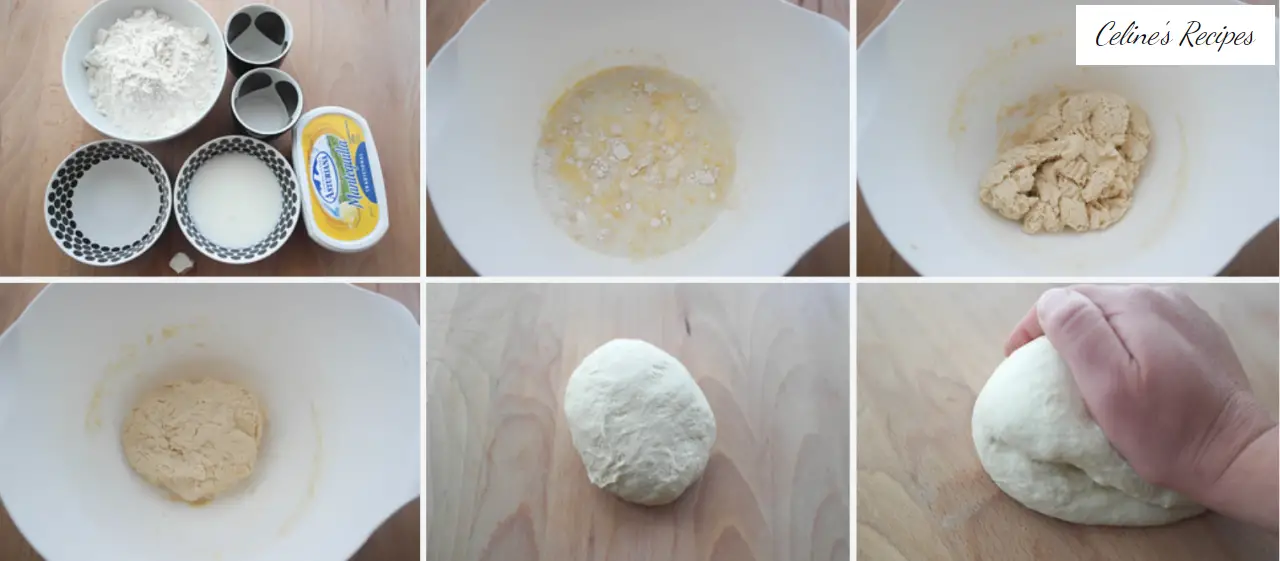
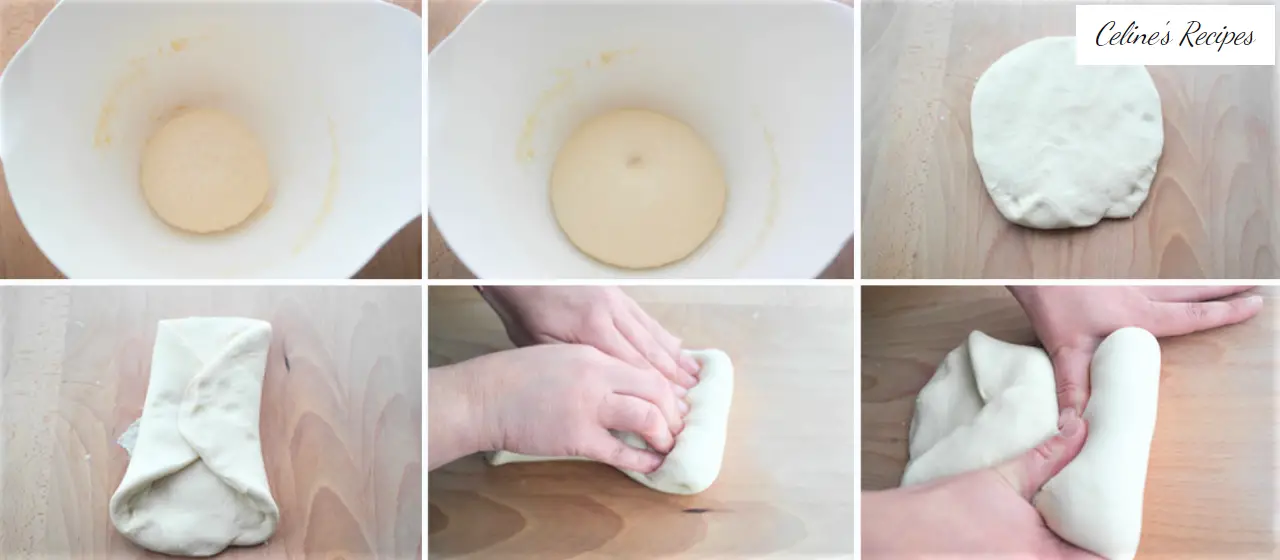
- We mix all the ingredients (flour, butter in ointment, water, milk, salt, sugar and yeast) in a large bowl. We can mix them with the hands or with a spoon.
- There should be no lumps and the ingredients have all been integrated together until obtaining a homogeneous mass.
- Let it sit for 10 to 15 minutes. Always covered with a cloth or plastic wrap, so that later it is easier to handle.
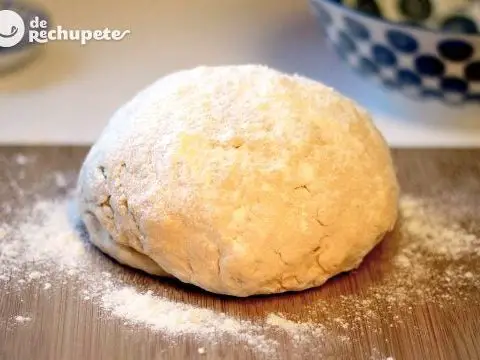
- We place the dough on a work surface and begin to work the dough by folding it and turning it, for 10 minutes.
- We should not flour the surface, it is not necessary. You should not add flour to make the dough easier to work with, because that excess flour affects the dough and the end result will not be as fluffy and light.
- At first the dough will tend to stick slightly, but after 1 or 2 minutes of work it will be completely manageable.
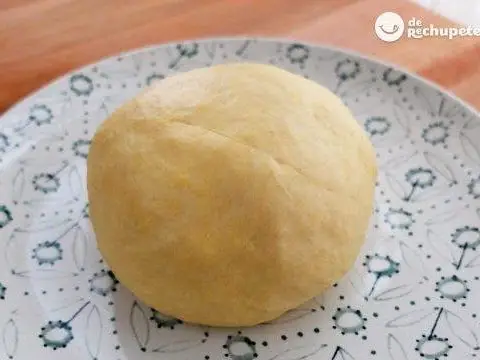
- We put the dough in a bowl and let it ferment for 1 hour 30 minutes. The dough will not grow too large.
- We will know that it is ready when when you press it lightly with a finger, the imprint remains for a time.
Kneading the sliced bread
- We are going to put the dough on the work surface and proceed to degas it.
- It is the way to eliminate gas bubbles that will have formed inside. For this we crush it forcefully, without fear. We will have a kind of flat cake.
- When kneading, if the dough is too sticky, let it sit for 5 minutes and then knead again. It can be repeated as many times as necessary.
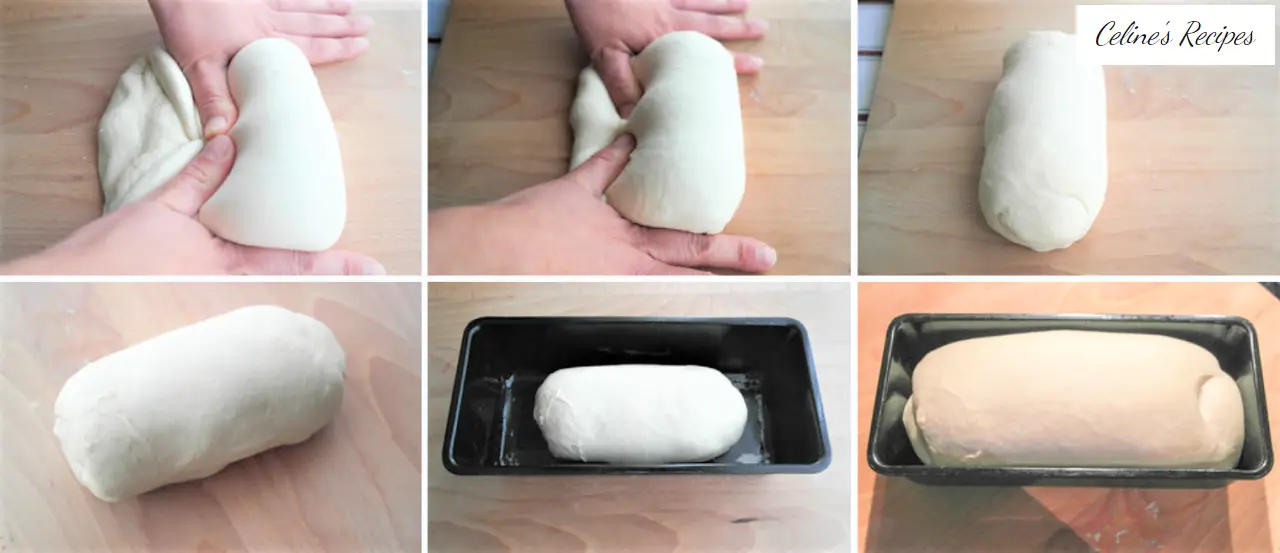
- With the cake already worn out we proceed to fold it by folding the left and right sides inwards.
- We roll the dough so that we tighten the closure with each turn we take. It is about slightly tightening the dough by turning it, sealing it with each turn.
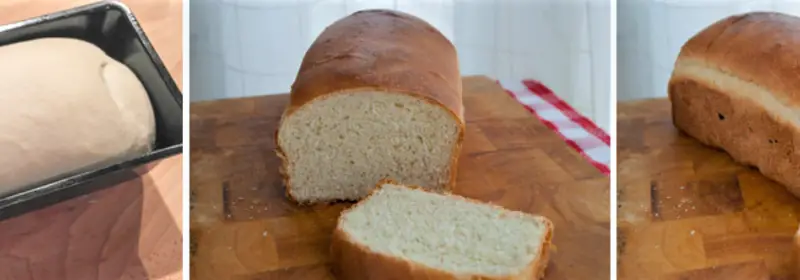
- We put the cylinder of dough in an elongated mold greased with oil or butter.
- Let it ferment for 2 hours covered with a cloth, in a warm place. At the end of this time the dough will have doubled in volume.
Baking and final presentation of sliced bread
- We preheat the oven to 250 ° C about 15 minutes before this last leaven ends.
- In this case, heat up and down with the tray on the bottom so that it is also heated in the oven.
- We paint the surface of the dough with milk.
- We lower the temperature to 220 ° C. Bake with heat up and down and the tray on the bottom for 25 or 30 minutes with a little aluminum foil.
- When there are 10 minutes left before the baking time is over, remove the foil and brown.
- We monitor the bread very well in the oven, so that the crust does not burn or is overcooked, because it would lose fluffiness.
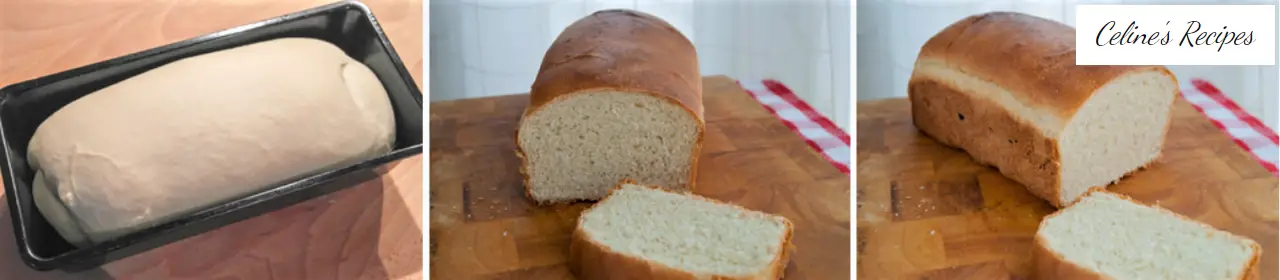
- After these 25-30 minutes of baking, you have to let the steam escape from the oven.
- We do it with the oven off and slightly opening the door slightly using the handle of a wooden spoon.
- In this way the crust will not be gummy. Leave it like this for 10 more minutes. In total 35-40 minutes will have passed.
- We demolish and if you see that it is not very golden by the part that remains inside the mold, we put in the oven another 10 minutes in the oven without mold only with heat from below.
- Remember that each oven is a world and there is no one better than you to know how to bake this bread. So the tips and the time variation in baking.
- A very simple recipe for sliced bread, homemade, soft on the palate, and like any other bread of this style, tender and fluffy.
You can see all the photos of the step by step in the next album . Follow the step by step and you will get a perfect loaf of bread,
Tips for a yummy loaf pan
- If you want an even softer bread than this you just have to increase the proportion of milk. Bread increases with the proportion of milk. This sliced bread is perfect because it does not come out too soft and yet it is quite tender, great for sandwiches.
- For this of the 180 ml. of liquid that carries the recipe, half is water and the other half is milk. If you want it to be more tender you just have to put whole milk, no water.
- I admit that since I bought bread at Blanca’s bakery (Panadería Orchapán) I have not tried anything similar. It is delicious, a fluffy, soft, tasty crumb … you will not have better toasts for breakfast or snack.
- Accompany a few slices of this bread with any food and any type of ingredient that you want to use to fill it. That is, making a sandwich or sandwich.
- Finally I advise you to let it settle a bit, until the next day, and then cut the bread into slices.
- In order to cut the slices well, use a very sharp serrated knife once it has cooled down to prevent it from crumbling.
- The secret of how to make homemade sliced bread is patience and quality ingredients.