
Info.
- Half
- 60 minutes
- For 4 people
- 2.1 € / person
- 305kcal per 100g.
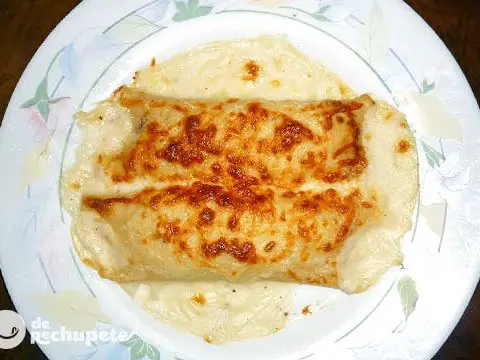
How to make gluten-free and lactose-free ham croquettes .
Who does not like croquettes ? It is almost impossible to meet someone who can resist this appetizer recipe that I propose.
It is the cover par excellence, with that crispy surface and a creamy interior in which we can find all kinds of fillings. Even being lactose or gluten intolerant is no longer a reason to give them up.
Today we are going to prepare ham croquettes (although we can change that ingredient for practically any other) gluten-free and lactose-free. A way to enjoy one of the foods that you like the most at home and that succeed every time you prepare them.
These croquettes can be prepared in advance, frozen for any dinner or lunch, and many different fillings can be used. A perfect way to take advantage of meat or fish remains. Although in this case we have opted for the classic ham, an adaptation of the one we already have on the blog and which they like so much.
In Spain we modify this precious bite a bit, making it what we know today and find in any restaurant. In my house, the croquette is the queen of leftovers. What leftover cod, then cod croquettes ! What leftover stew, then steamed croquettes !
Let’s discover how easy it is to prepare intolerance-proof croquettes. Taking advantage of the fact that it is already very easy to find ingredients that allow everyone to enjoy them.
Preparation of the base of the croquettes without gluten or lactose of ham
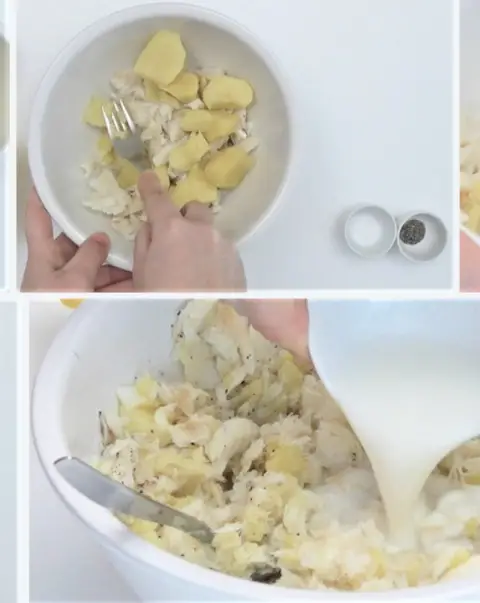
- Peel and chop the onion very fine (or go through the grinder). The objective is that it is almost not noticeable when biting, although if you like it with ham stumbles, do not chop the ham, cut it by hand very fine. We reserve.
- In a large skillet, pour two heaping tablespoons of extra virgin olive oil. Add the onion and put it to cook over very low heat.
- Heat the lactose-free milk over medium-low heat and dissolve the gluten-free flour or cornstarch in warm milk.
- When the onion is transparent, we add the milk with the dissolved flour. Season with salt and pepper and add the nutmeg. I add a pinch and a half, because I really like this spice and a little salt to taste (be careful that the ham is already very salty).
- We stir continuously so that no lumps appear, over medium heat. To make the dough look good, you have to be patient and stir for a long time. Until it peels off the edges as the bucket passes. When it has started to thicken, add the minced ham and continue stirring.
- We separate the casserole from the fire, remove the dough to a bowl or to a source and let it cool.
- I advise you to cover it once cold with food plastic wrap or film. We leave it in the fridge until the next day (approximately 24 hours).
- It is important that you do not put the film immediately. To prevent drops from heat and steam. Also you avoid that scab that later is difficult to handle.
Shape, batter and fry of ham gluten-free croquettes
- Now the fun begins, we begin to shape the croquettes. This is perhaps my secret, rest, so the dough will be more consistent when coated.
- If you are in a hurry or are for the same day. You can use the freezer so that they cool quickly and are easier to handle.
- We beat two eggs in a deep plate and put plenty of gluten-free and lactose-free breadcrumbs on a smooth plate. We prepare the ingredients for the batter, the beaten eggs and the breadcrumbs in bowls.
- We form the desired shape for the croquettes, at home we help ourselves with a spoon. To roll the croquettes by hand, it is best to spread them with a little oil so that the dough does not stick to us.
- We take a portion of dough and give it the desired shape. Elongated or in the form of balls and we pass them, initially by breadcrumbs.
- We dip each ball of croquette in the beaten egg and then, well drained. We coat them with breadcrumbs and again with the egg.
- We heat in a deep frying pan a good amount of extra soft olive oil to fry. Once hot we are frying the croquettes.
- We have to take the precaution of bathing the croquettes with the oil on their upper face while they are frying. This will prevent them from opening and the filling comes out.
- We reserve on an absorbent paper, and thus we will remove the excess oil.
Although there are those who enjoy cold croquettes at home, we eat them as soon as they are made, when they are still hot.
The good thing about this recipe is that we can also keep them in the fridge for a few days before going through the pan, and even freeze them to fix a dinner or an impromptu snack in a jiffy.
You can see all the photos of the step by step in this recipe album of gluten-free croquette of ham . Follow this step by step and the video, I assure you that they will look good the first time, as if you were an expert in croquettes.