Info.
- Half
- 180 minutes
- For 8 people
- 0.4 € / person
- 202kcal per 100g.
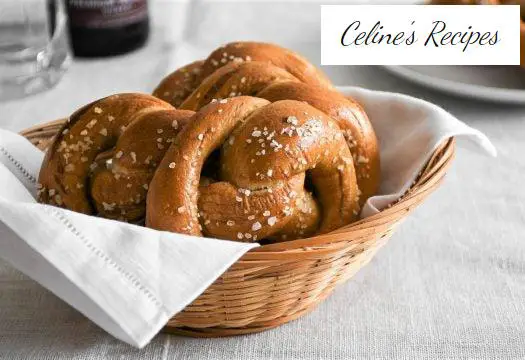
How to make homemade bretzel.
Surely you have heard of bretzels or pretzels , bow-shaped muffins that, although they come from Central Europe, are specifically associated with Germany.
They are characterized by a very toasted, thin and crispy crust, and by the coarse salt with which they are dusted, which makes them even more crisp.
In Germany they are eaten as a snack and, accompanied by a good beer, they are the perfect lunch. There are countless recipes with which to make these breads.
There are very elaborate, complex and with techniques that are not within the reach of the home bakery. We leave those for the professionals.
We have chosen to share one of the most basic and with more possibilities of success. Because, after all, what we want is for them to work out right the first time, investing as little time as possible and with the least effort. True or not?
These breads also work well with it and you will surely dare to prepare them more times. We go with them!
Bretzel dough preparation
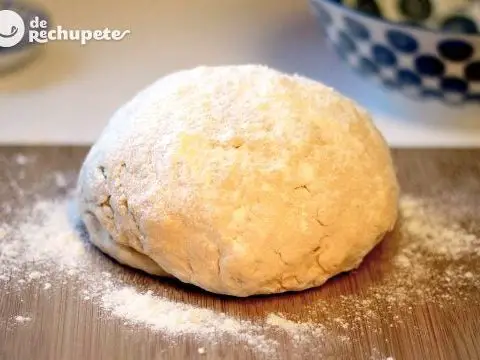
- Crumble the yeast with your fingers and mix it, in a deep and wide container, with the flour, the water, the butter, which should be at room temperature, and the salt.
- Mix with a spoon and, when we can no longer and the dough resists, knead with our hands.
- We do it on a clean work surface, without adding flour as it is an easy to handle dough, and working the dough for a few minutes until it is smooth.
- Return the dough to the container, cover with a clean, dry cloth and leave it light for about an hour. This will depend on the ambient temperature.
- If it is hot, the dough will rise very fast, otherwise we may need to wait longer.
- Once the dough is lifted, we press with our fist and degas, gently kneading again.
Asamado and shape of the bretzel
- We divide into six portions as similar in weight as possible. To make them equal, it is best to weigh the whole mass and divide by six.
- We take portions of the dough and weigh until we get the right weight.
- We stretch each portion of dough and form cylinders as long and thin as possible.
- Ideally, they should be 30-35 cm long and 1.5-2 cm thick. The cylinders will shrink so it is convenient to let them rest for a few minutes and stretch again until the approximate measurements are reached.
- Once all the cylinders are ready we form the bretzel and make the knot or loop so characteristic.
- We take the tips and bring them closer to us, making like a horseshoe. We cross one point over another. We take the tips again and cross them over one another.
- To finish forming the pretzel, we bring both ends back and over the rest of the loop.
- Pinch each end a little on the round side of the bow, so that they stick together, and turn the bow over.
- In the step-by-step gallery we show you how to form them, it is much simpler than it may seem and, as the saying goes, an image is worth a thousand words.
Bretzel preparation. Bath and final baking
- We place the bretzel or pretzel on a baking sheet covered with parchment paper, cover with a clean and dry cloth and leave to ferment again.
- When they have risen, but without doubling in volume, we prepare the baking soda for the blanching.
- We put the water and the bicarbonate in a pot and bring to a boil. When it boils we introduce the ties and we will keep them in the water for about 20 seconds on each side.
- We remove with a slotted spoon and place them on the baking tray again.
- Brush the bretzel or pretzel blanched with the beaten egg and spread over it a little coarse salt or salt flakes.
- Cook in the oven, preheated to 240º C with heat up and down, for 12-14 minutes or until well roasted.
- We remove from the tray and let cool on a rack before consuming.
You can see all the step by step photos of the bretzel recipe in this album.
Tips for the perfect homemade bretzel
- One of the steps that we have changed from the original recipe is that of bathing in caustic soda for blanching in baking soda. Caustic soda is uncomfortable, you have to protect your hands with gloves and be very careful when dissolving it in water.
- That is why we recommend baking soda, easier to find as an ingredient and much more comfortable.
- Blanching not only exaggerates the crust’s browning, but also gives it a distinctive flavor and somewhat different internal consistency. The crumb is slightly more rubbery and moist.
- You can do without it and brush the loaves with the egg once they are raised a second time, but the result will not be so authentic.
- When lifting the dough, we always recommend looking at the volume rather than the indicated fermentation time. It all depends on the ambient temperature. With heat the masses rise faster, with cold the growth slows down.
- The coarse salt of the bark can be replaced by salt flakes or even sesame, poppy, chia seeds or other seeds of your choice.