Info.
- Half
- 45 minutes
- For 8 people
- € 1 / person
- 314kcal per 100g.
The past weekend has been full of celebrations, on the one hand we have joined the family for the birthday of my father, a young man of 70 who is in the best of life.
And on the other, we celebrate that we have a new book in the bookstores: “ Desserts de rechupete “. For this, we chose my father’s winery in La Forraqueira , a beautiful corner of La Ribeira Sacra that has become the usual meeting place when we go to Ourense.
I was always curious about the masses, puff pastry, saber, breeze or broken … it is true that the market offers us the opportunity to dedicate ourselves to a recipe without worrying about the mass since they are all sold and in many cases they are quite acceptable. But when I have the opportunity I always like to make them, this time it was the turn of the broken dough. Its origin is French, dough brisse , and its literal translation is crisp, crisp. It is ideal for recipes, both sweet and salty. It is important that you have a minimum of kneading to avoid gluten developing and becoming a hard elastic dough before cooking and little crisp once baked.
There are as many recipes as there are cooks who prepare it, the common base always being a quantity of flour and half of that weighing in butter. Although this time I have not done it like that, sugar is usually added when preparing for sweet recipes, dough . In other cases, an egg or yolk is included.
We can make endless recipes with this base, all kinds of quiches and tartlets, both sweet and salty. In this case it helped me to get out those bananas that when they are very ripe nobody wants to eat and, many times we end up throwing. But what would you think of some tartlets filled with lemon curd (lemon cream) with strawberries, or a quiche with vegetables and goat cheese … mmmm !!! The process of its elaboration is extremely easy, so I encourage you to prepare it, it is only a matter of practice.
Preparation of shortcrust pastry
- We start by preparing the shortcrust pastry . For this, in a large bowl we put the flour, the very cold butter in pieces and the salt. With the tips of your fingers we will integrate the butter with the flour until it is like pea crumbs. It may be that there are pieces of butter that have not been fully integrated, do not worry, that will make the dough crispier.
- It is very important not to “knead”, the idea is only to integrate the flour with the butter, we do not want the flour to begin to develop gluten or the butter to melt with the heat of the hands, so it is necessary to work quickly.
- Add the cold water. It is recommended not to add all the water at once to avoid passing us. We try adding the ¾ parts and seeing how it turns out, if the dough is very dry and does not allow us to form a ball, we add the rest.
- The water acts as a cement for the crumbs that we have formed, do not expect to find a pie type dough, totally cohesive, there will be a dough that crumbles very easily.
- We compact the crumbs with the water to form two balls. It is a somewhat disconcerting process since it is sure that it will seem to you that it is impossible for that pile to get “stuck” in a ball with so little water, but do not despair. Help each other with the palms of your hands and work the crumbs like when you played with almost dry sand on the beach making balls, that was the feeling that remained for me.
- We wrap each ball in transparent film and let them rest in the fridge for about 30 minutes.
- If you want to expand the recipe for broken pasta I leave you this link where it is explained more fully.
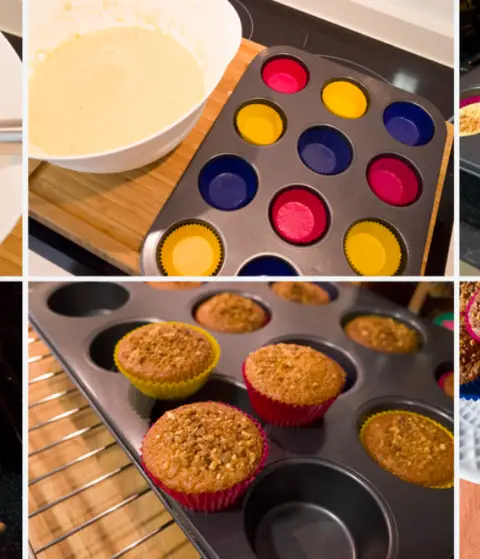
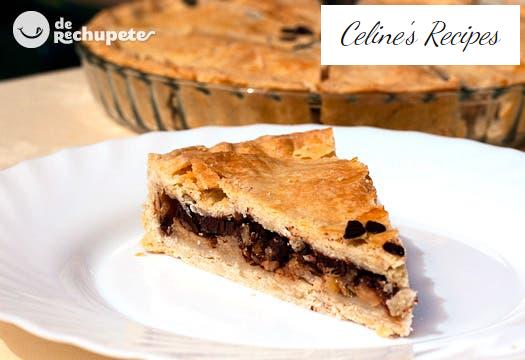
Preparation of the cake
- We prepare the chocolate paste for the decoration mixing all the ingredients and reserve. This step is totally optional, so if it is not going to be decorated we skip the process.
- We prepare the filling by chopping the bananas, the chocolate and a bit of the hazelnuts, to have them at hand when you need them. We reserve.
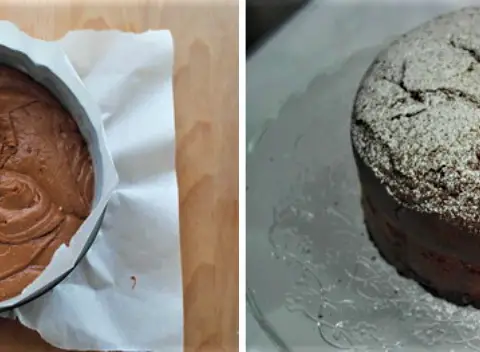
- After this resting time of the broken dough, remove one of the balls and stretch it with the help of a rolling pin, placing it between 2 baking papers. We stretch it to get a more rounded shape, although it depends on the type of mold you are going to use, and with a thickness of 0.5 cm.
- We cover the base of the mold with the stretched dough leaving it to protrude from the edges. At this time we will place the tart filling, the sliced banana and spread the chocolate and hazelnuts on it. We paint the edges with water so that when we put the lid on, it will stick. We reserve.
- We repeat the stretching operation with the other ball of dough that we have in the fridge. If we are going to decorate it, this is the time to do it, before placing it on the cake. For this we can use a pastry bag with the chocolate paste or spread it on a template or stencil. In the case of using a template, we place it on the stretched dough on the countertop, holding it firmly and spread on it the chocolate paste that we had reserved. We cover all the holes in the template with the paste and remove the excess so that there is a thin layer. We remove the template carefully.
- We put the lid on the cake that we had reserved and press the edges to seal the two layers of dough. With the help of a knife, cut the excess dough around the edges and make 2 holes to serve as fireplaces for the steam to escape at the time of baking.
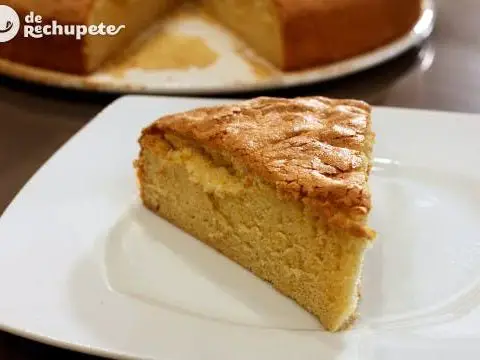
- While the oven is preheated to 170º we keep the cake in the freezer. Bake about 25 minutes. Remove from the oven and let cool for a few minutes. I recommend that you prepare this cake on the same day that you go to take it, it can be served warm or cold, but when you leave it overnight the dough can be a little dry.